Old hardwood floors can add undeniable charm to any home—but over time, they often lose their luster. From scratches and scuffs to dull finishes, even the most durable wood flooring begins to show signs of wear. If your floors look tired and faded, Hardwood Floor Restoration may be the key to reviving them without a full replacement.
Restoring hardwood floors not only enhances the appearance of your space but also extends the life of your flooring. This process involves more than just sanding—it includes deep cleaning, repairing damaged sections, and applying the right finish to bring back the original character. Here's a step-by-step guide to revitalizing your hardwood floors, optimized for both readers and search engines.
Why Restore Instead of Replace?
Restoration maintains the character of your floors while saving time and money in South Bend IN. It’s a smarter choice with Affordable Hardwood Floor Refinishing when the wood is still structurally sound.
- Cost-Effective: Restoring is often significantly cheaper than replacing hardwood floors entirely.
- Preserves Original Materials: Older floors are typically made of higher-quality wood that's no longer available.
- Increases Property Value: A well-maintained hardwood floor is a strong selling point for potential buyers.
Assess the Condition of Your Floors
Before any work begins, examine the surface for visible damage, deep stains, or structural issues. Light wear may only require cleaning and refinishing, while deep scratches or warped boards might need more intensive repairs. A floor that's still structurally sound is almost always a good candidate for restoration.
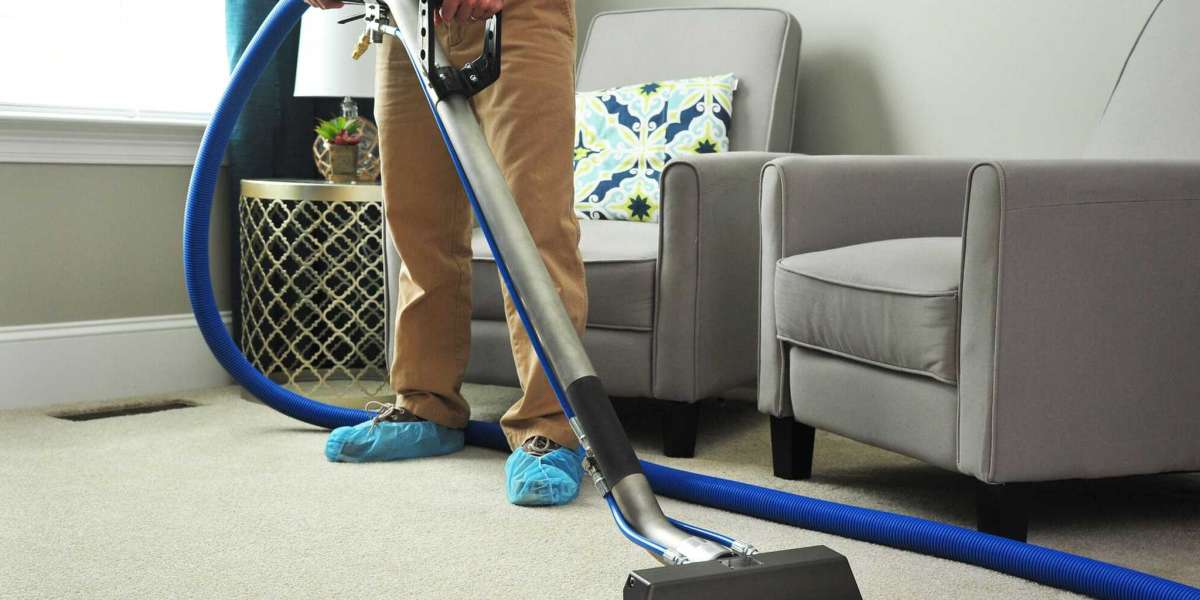
Deep Clean the Surface
Dust and dirt can embed themselves into wood grain over time. Use a hardwood floor cleaner to remove surface debris. Avoid water-heavy mopping, as excessive moisture can warp boards and ruin finishes. Microfiber mops and pH-balanced solutions are best for maintaining the wood’s integrity.
Sanding—The Core of Floor Restoration
- Leveling the Surface: Floor sanding removes old finishes and levels uneven spots.
- Smoothing Out Damage: Scratches, minor gouges, and old stains can be eliminated through sanding.
- Preparing for Refinish: Sanding opens the wood grain, allowing new stain or sealant to adhere more effectively.
Using a drum or orbital sander, professionals strip the top layer of wood carefully. Multiple passes with varying grit levels ensure a smooth and even surface. Corners and edges require hand sanding for a consistent finish across the room.
Fill Gaps and Repair Damaged Boards
After sanding, identify any gaps between boards or holes that need filling. Wood filler or color-matched putty can address minor imperfections. Severely damaged planks should be replaced or repaired to match the rest of the floor seamlessly.
Choose the Right Stain and Finish
- Stain for Color Enhancement: Choose a stain that complements your décor while enhancing the natural grain of the wood.
- Finish for Protection: Polyurethane finishes—available in water- or oil-based forms—provide durability against wear, moisture, and sunlight.
- Sheen Level Options: From matte to high-gloss, the finish sheen can dramatically affect your floor's appearance.
Each finish type has pros and cons. Water-based polyurethane dries faster and emits less odor, while oil-based finishes offer deeper color and longer-lasting protection.
Apply the Finish Correctly
Apply at least two to three coats of finish using a clean applicator. Allow ample drying time between coats, as rushing this step can lead to bubbling or uneven surfaces. During this process, foot traffic should be avoided until the final layer has cured completely—usually within 24 to 48 hours depending on humidity.
Maintain the Restored Floor
- Use Area Rugs in High-Traffic Zones
- Avoid Harsh Cleaners and Wet Mopping
- Install Furniture Pads to Prevent Scratches
- Refinish Every 7–10 Years or As Needed
Proper maintenance extends the life of your refinished floor and reduces the need for future restoration.
Conclusion
Restoring hardwood floors is an investment in the character and longevity of your home. With the right techniques—from deep cleaning and sanding to finishing and ongoing care—you can give worn-out wood flooring a second life. Not only does this save money compared to replacement, but it also preserves the natural beauty of the original material.
Whether you're preparing your home for sale or simply want a fresh look, floor restoration is a smart and sustainable choice that delivers long-term value.
FAQs
- How much does hardwood floor restoration cost per square foot?
The national average ranges from $3 to $8 per square foot depending on the floor’s condition, materials used, and local labor rates. - Can engineered hardwood floors be restored?
Yes, but only if the top veneer layer is thick enough to withstand sanding. Thin veneers may not allow for full refinishing. - How long does the hardwood restoration process take?
A typical project takes 3 to 5 days including sanding, staining, and finishing. Larger spaces or extensive damage may extend this timeline. - Is dust-free sanding really dust-free?
While not 100% dust-free, modern equipment with vacuum attachments significantly reduces airborne particles during sanding. - How do I know if my floors need restoring or replacing?
If the boards are structurally sound and haven’t been sanded too many times, restoration is likely the better (and more cost-effective) option