Photographing gold, silver, or platinum isn’t just about snapping a pretty picture. These materials are reflective, sensitive to light, and show every single speck of dust. That makes jewelry photography challenging, even for pros. But here's the good news: the right jewellery retouching techniques can take your images from good to breathtaking.
Do you ever feel frustrated when your metal pieces look dull, flat, or too shiny in photos? You’re not alone. Many photographers struggle to find that balance. This guide walks you through practical, real-world tips for editing precious metal jewelry photos, without making them look fake.
Why Photographing Precious Metals Is So Tricky
Precious metals are gorgeous—but only when captured properly. Their shine can easily turn into a harsh glare. Tiny flaws like dust, tarnish, or fingerprints? They show up clearly in high-res shots. Plus, lighting often reflects in awkward ways, adding uneven tones or shadows.
Here’s what usually goes wrong:
Overexposed highlights that lose metal texture
Faint scratches or dust spots that distract the eye
Color shifts caused by the wrong white balance
Fingerprints that kill the luxury feel
If any of this sounds familiar, don’t worry. A few retouching tweaks can solve it.
Better Raw Photos = Less Editing Work
Retouching is easier when your base image is strong. Start by improving your photography setup:
Camera Settings
Use a macro lens for clear close-ups
Set a low ISO to avoid noise
Keep aperture around f/8 to f/11 for sharp focus
Background Props
Use neutral backgrounds like white, gray, or black
Avoid colored props unless part of the product story
Keep surfaces clean to reduce cleanup later
Lighting Tips
Use softboxes or diffusers to soften reflection
Place lights at angles to avoid direct bounce
A light tent can help evenly light all sides
Retouching Tools Every Photographer Should Know
No matter how good your shot is, a little polish can elevate it.
Software Choices
Adobe Photoshop: Best for detailed retouching
Adobe Lightroom: Great for batch color corrections
Capture One: Excellent RAW processor with color accuracy
Key Tools
Clone Stamp Healing Brush: Remove dust, scratches, blemishes
Dodge Burn: Control highlights and shadows with precision
Adjustment Layers: Tweak brightness, contrast, and saturation
Pro tip: Always work on a duplicate layer so your original is safe.
Step-by-Step Retouching Workflow
Start simple. Then move to detail work.
1. Clean the Surface
Zoom in at 100%
Remove dust, fingerprints, and tiny scratches
Keep texture natural—don’t over-blur
2. Fix Color Issues
Adjust white balance first
Use hue/saturation tools to fine-tune golds and silvers
Watch out for unwanted color casts (green or purple)
3. Enhance Shine
Carefully dodge highlights to bring back sparkle
Don’t turn the metal into a mirror—it should still look real
Use curves to boost contrast in specific areas
4. Add Natural Shadows Reflections
Duplicate image and mirror it for reflection effects
Use gradient masks for soft shadow under the item
Keep shadows consistent across all product photos
Tips for Editing Specific Metals
Each metal has its own visual signature. Your edits should reflect that.
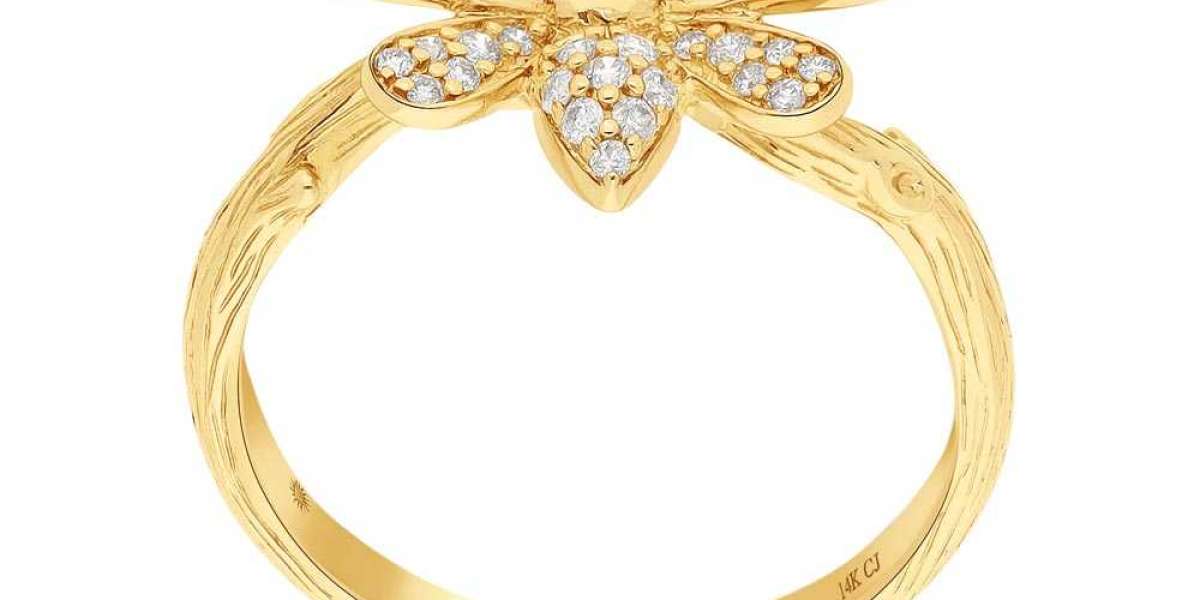
Gold
Warm it up using selective color adjustments
Avoid over-saturation—it should glow, not scream
Silver
Increase mid-tone contrast for clarity
Keep it neutral—don’t shift it blue or yellow
Platinum
It’s all about subtlety
Keep highlights smooth and tone balanced
Watch Out for These Mistakes
Photographers often go overboard. That leads to fake-looking results. Here’s what to avoid:
Sharpening too much: Makes metal look rough
Excessive glow or shine: Kills realism
Inconsistent edits: Confuses the viewer when browsing
Always step away from the screen for a few minutes. Then look at your edit again.
Quick Answers for Voice Search
What’s the best way to retouch gold jewelry? Start by adjusting the white balance. Then use selective color tools to bring out the warm gold tone. Remove blemishes, and enhance highlights carefully.
How do you remove scratches from jewelry photos? Use the healing brush or clone stamp tool at a small size. Work zoomed in. Keep texture intact.
Can I edit jewelry photos on my phone? Yes, but only for basic fixes. Apps like Snapseed or Lightroom Mobile can do simple retouches. For pro results, use a desktop editor.
A Personal Story from the Studio
Last year, I worked with a client who sent in product photos of gold bangles for an online catalog. They had great lighting and angles—but every piece had tiny smudges and a dull shine. I spent time carefully boosting contrast and bringing out the golden warmth. The result? Their sales on that product page went up by 28% within a month.
It reminded me how much first impressions matter—especially online. A flawless photo isn’t a bonus—it’s the expectation.
Final Quick Tips for Scroll-Stopping Jewelry Photos
Keep your edits consistent across collections
Always view your final edit at 100% zoom
Export in high resolution for web and print
Use before/after sliders to show clients the difference
Save different file versions for backup and reference
Try These Tips Today
Clean edits make jewelry look expensive—and that builds trust. Take one of your old jewelry photos and apply just a few of these tips. You’ll be surprised at how much more polished and professional it looks.
Don’t want to spend hours on editing? Or just need a second pair of eyes? Reach out—I’d be happy to help polish your photos to perfection.